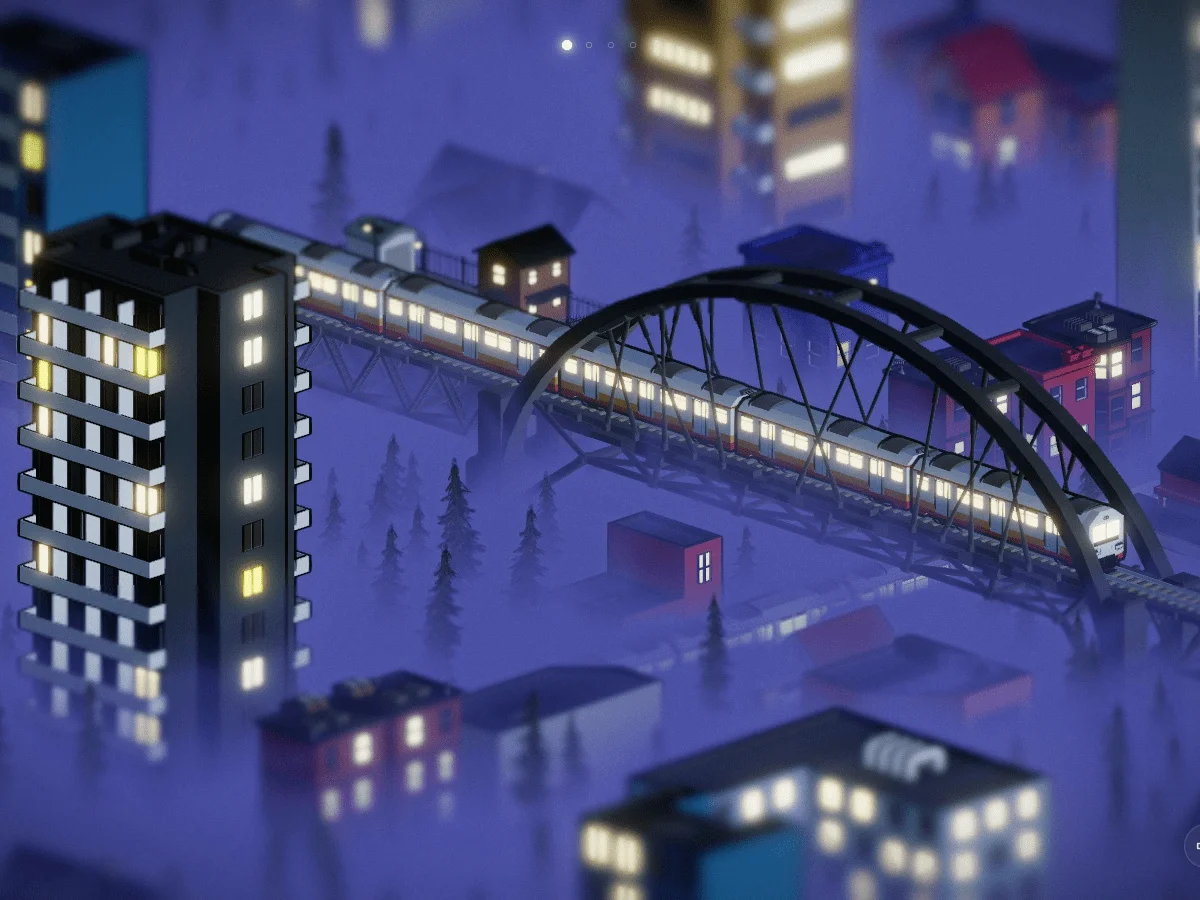
The Sleepers serves as an engaging showcase of WebGL created for Bruno Simon’s Three.js challenge.
Producing a project under such circumstances demands not just creativity but also efficiency. Tight deadlines and a lack of compensation galvanize developers to prioritize performance and simplicity over complexity.
This exploration examines several straightforward WebGL methods designed for speed and ease of use, aimed at delivering visual richness without delving into intricate technicalities.
Let’s unpack some of the strategies used within this project.
Captivating Swirling Transition
The first step involves a simple black and white texture, which can look like this:
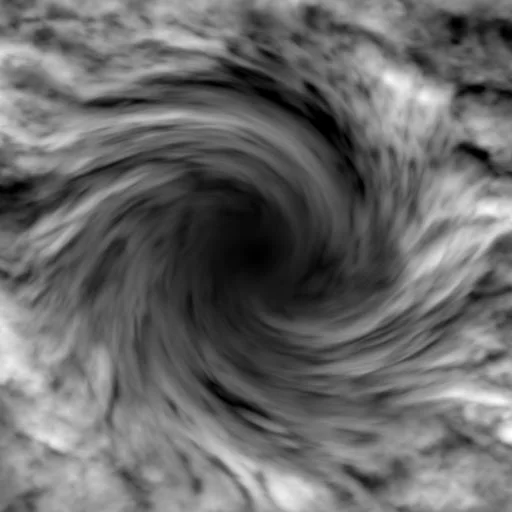
This texture is employed as a uniform in a post-processing shader to govern the transition from a dark grayscale depiction to vibrant colors. It’s clever: the red channel of the texture sets a threshold for each pixel, which determines when the change occurs.
Below is a streamlined version of the shader code used:
uniform float uProgress;
uniform sampler2D uTransitionTexture;

vec3 greyscale(vec3 color, float str) {
    float g = dot(color, vec3(0.1));
    return mix(color, vec3(g), str);
}

void mainImage(const in vec4 inputColor, const in vec2 uv, out vec4 outputColor) {
    vec3 greyScaledColor = greyscale(inputColor.rgb, 1.);
    greyScaledColor = mix(greyScaledColor, vec3(0.1, 0.1, .9), pow(uProgress, 5.));

    vec4 textureColor = texture2D(uTransitionTexture, vUv);
    float mixer = step(textureColor.r, uProgress);

    outputColor = vec4(mix(greyScaledColor, inputColor.rgb, mixer), 1.);
}
As uProgress ranges from 0 to 1, various sections of the screen are revealed sequentially, creating an engaging animation. Darker pixels emerge first, followed by the lighter ones, making the transition feel organic and fluid. This technique showcases how simplicity can produce visually striking effects without complicating the shader logic.
Creating Lush Fog Effects
This fog effect isn't volumetric; rather, it’s a clever application of color manipulation within the scene materials.
Step 1: Linear Vertical Fog Implementation
Initially, we modify the shader (using onBeforeCompile) that will affect all materials in the scene.
By leveraging the world position of each fragment, we can dictate its color based on vertical positioning: above a specified Y value, colors remain intact, whereas below, we apply the fog color.
const fogOnBeforeCompile = (shader) => {
    shader.vertexShader = shader.vertexShader.replace(
        'void main() {',
        `
        varying vec3 vWorldPosition;
        void main() {
            vWorldPosition = (modelMatrix * vec4(position, 1.0)).xyz;
    `)

    shader.fragmentShader = shader.fragmentShader.replace(
        'void main() {',
        `
        uniform float fogPositionY;
        uniform float fogSmoothness;
        varying vec3 vWorldPosition;
        void main() {
    `)

    shader.fragmentShader = shader.fragmentShader.replace(
        'vec3 outgoingLight = totalDiffuse + totalSpecular + totalEmissiveRadiance;',
        `
        vec3 outgoingLight = totalDiffuse + totalSpecular + totalEmissiveRadiance;

        float verticalMixer = smoothstep(vWorldPosition.y - fogSmoothness, vWorldPosition.y + fogSmoothness, fogPositionY);
        float mixer = clamp(verticalMixer, 0., 1.);
        vec3 fogColor = vec3(1.);

        outgoingLight = mix(outgoingLight, fogColor, mixer);
    `);

    shader.uniforms.fogPositionY = { value: fogSettings.height };
    shader.uniforms.fogSmoothness = { value: fogSettings.smoothness };
}
This modified shader can now be assigned to various materials in the scene, allowing fog to be consistently integrated across the entire visual experience.
gltf.scene.traverse(child => {
    if (child.isMesh) {
        child.material.onBeforeCompile = (shader) => {
            fogOnBeforeCompile(shader);
        };
    }
});
Here’s what this shader technique can produce:
In practice, I wrapped the entire scene within a sphere shaded to create an effect, where fog is applied below a certain position while remaining transparent above, giving rise to a horizon fog illusion.
Step 2: Animate the Fog with Noise
To give the fog a sense of vitality, we introduce noise. Yet, calculating noise in real-time can be resource-intensive. An alternative is to use a seamless noise texture, exemplified here:
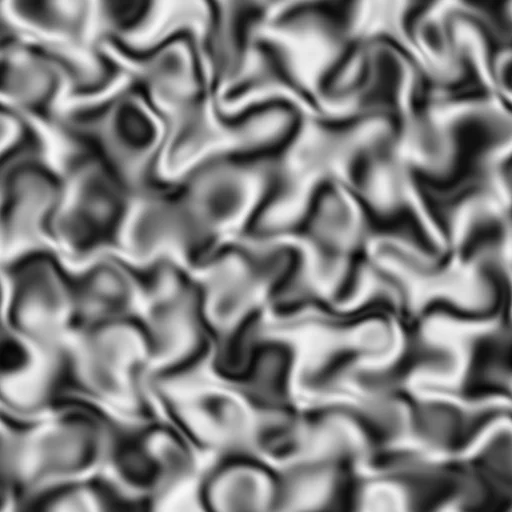
There’s a multitude of methods to incorporate noise while customizing your fog’s appearance. Personally, I implemented domain warping to create a dynamic fog surface, calibrating its depth based on the camera's distance from the worldPosition.
The following is an elementary version of the final shader incorporating these changes:
const fogOnBeforeCompile = (shader) => {
    shader.vertexShader = shader.vertexShader.replace(
        'void main() {',
        `
        varying vec3 vWorldPosition;
        varying vec2 vUv;

        void main() {
            vWorldPosition = (modelMatrix * vec4(position, 1.0)).xyz;
            vUv = uv;
    `)

    shader.fragmentShader = shader.fragmentShader.replace(
        'void main() {',
        `
        uniform float fogPositionY;
        uniform float fogSmoothness;
        uniform sampler2D noiseTexture;
        uniform float uTime;
        varying vec3 vWorldPosition;
        varying vec2 vUv;

        void main() {
    `)

    shader.fragmentShader = shader.fragmentShader.replace(
        'vec3 outgoingLight = totalDiffuse + totalSpecular + totalEmissiveRadiance;',
        `
        vec3 outgoingLight = totalDiffuse + totalSpecular + totalEmissiveRadiance;

        vec4 noiseColor = texture2D(noiseTexture, vec2(vWorldPosition.x * noiseFreq + uTime, vWorldPosition.z * noiseFreq + uTime));
        float noise = noiseColor.r;

        float verticalMixer = smoothstep(
            vWorldPosition.y - fogSmoothness,
            vWorldPosition.y + fogSmoothness,
            fogPositionY + noise);

        float mixer = clamp(verticalMixer, 0., 1.);
        vec3 fogColor = vec3(1.);

        outgoingLight = mix(outgoingLight, fogColor, mixer);
    `);

    shader.uniforms.fogPositionY = { value: fogSettings.height };
    shader.uniforms.fogSmoothness = { value: fogSettings.smoothness };
    shader.uniforms.uTime = 0;
    shader.uniforms.noiseTexture = fogSettings.noiseTexture;
}
Here’s a demo showcasing the fog animation you can interact with:
Outline Techniques for Mesh Details
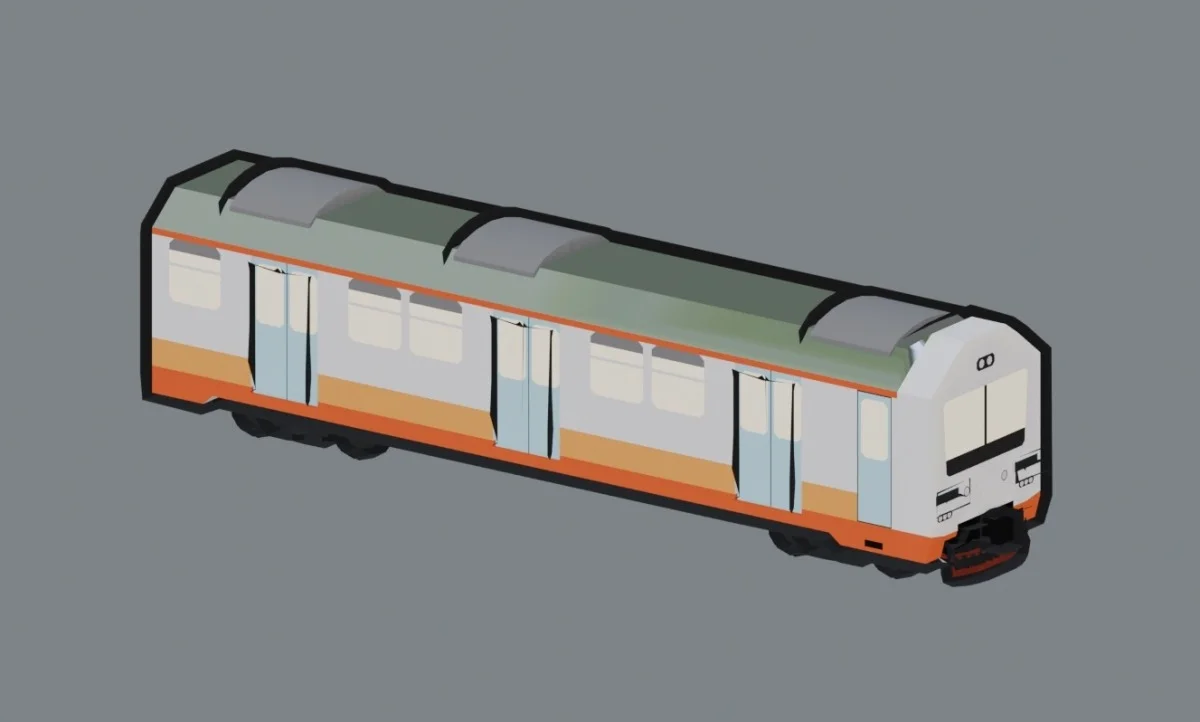
Outline rendering can go by several names: shell outline, backface outline, and inverted hull outline. Primarily, this approach draws from techniques in Blender.
Step 1: Utilize a Dedicated Outline Material
For creating a black outline, you’ll need to develop a compatible material. Although previously, the RGB node was usable to create a MeshBasicMaterial in Three.js, this option has been removed in Blender version 5.0.0. Instead, you’ll rely on the Principled BSDF node, which Three.js will convert into a MeshStandardMaterial, but that’s manageable as you can easily reassign it later.
Make sure to position your outline material in the last slot for ease of use later.
Don’t forget to enable backface culling; this will prevent the rendering of the material's backfaces.
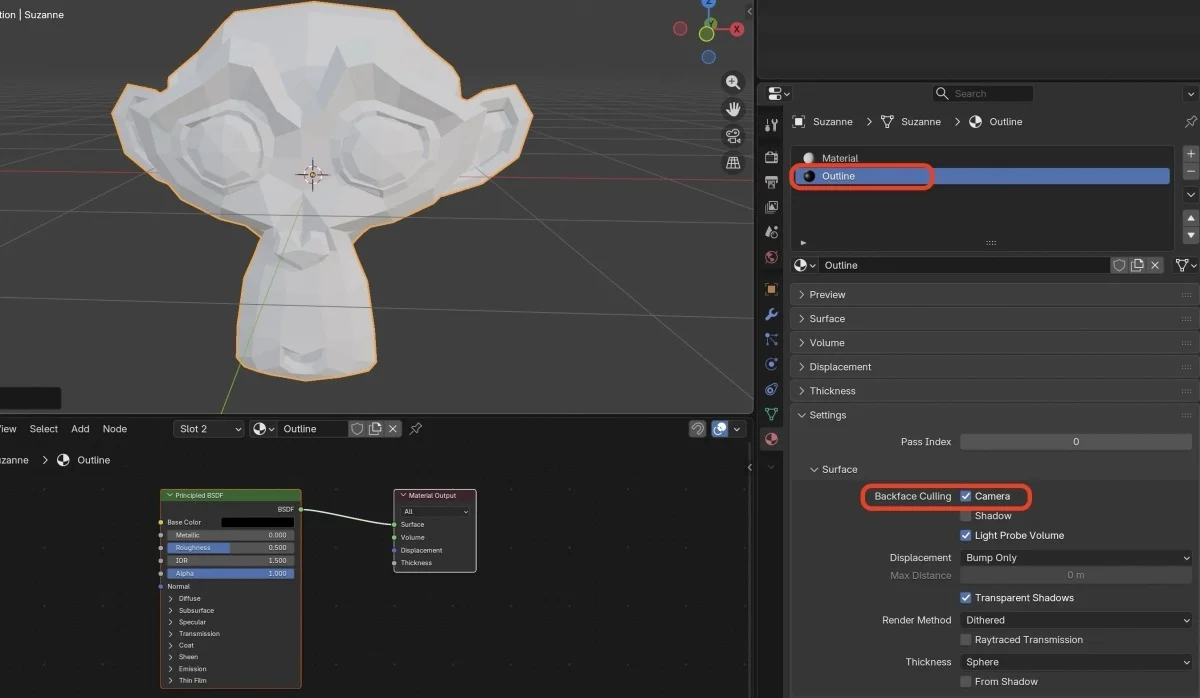
Step 2: Apply a Solidify Modifier
Add a Solidify modifier configured with a negative thickness and flipped normals. Don't forget to indicate the position of your outline material in the "Material Offset" field. For simplicity, place a higher number if you're applying across multiple objects with varying slot counts.
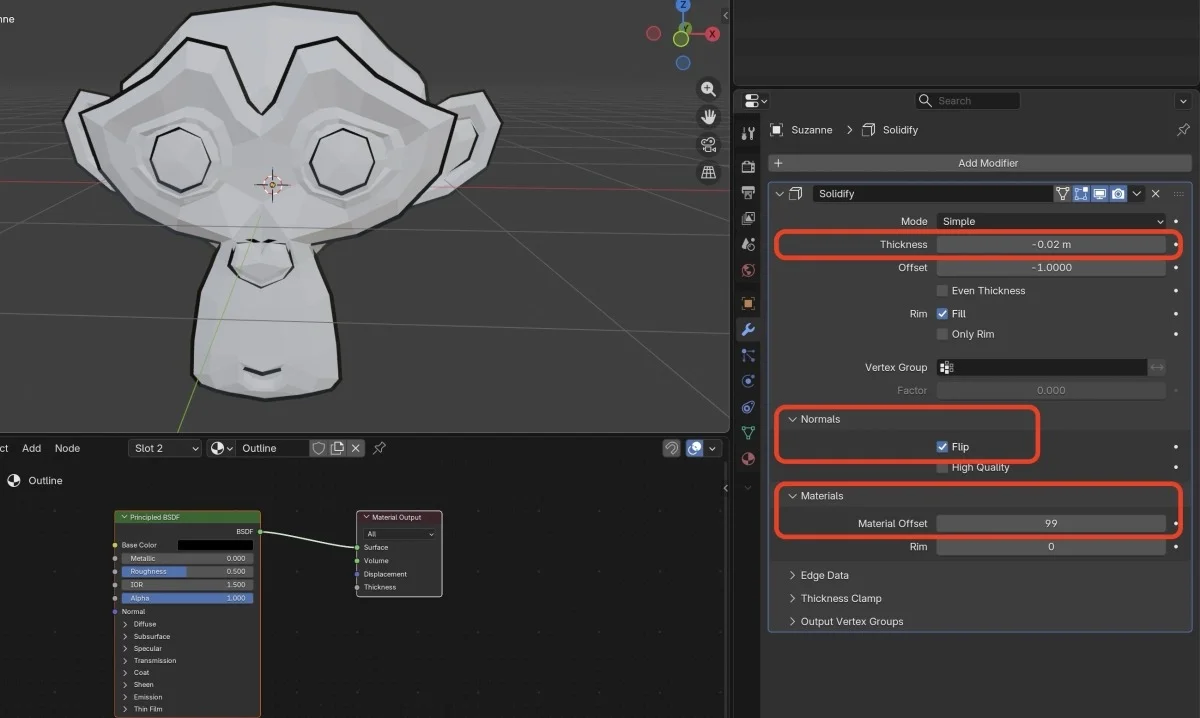
When exporting as a glTF, remember to select “apply modifiers” and “export materials”.
Infinite sceneries in a Scrolling City
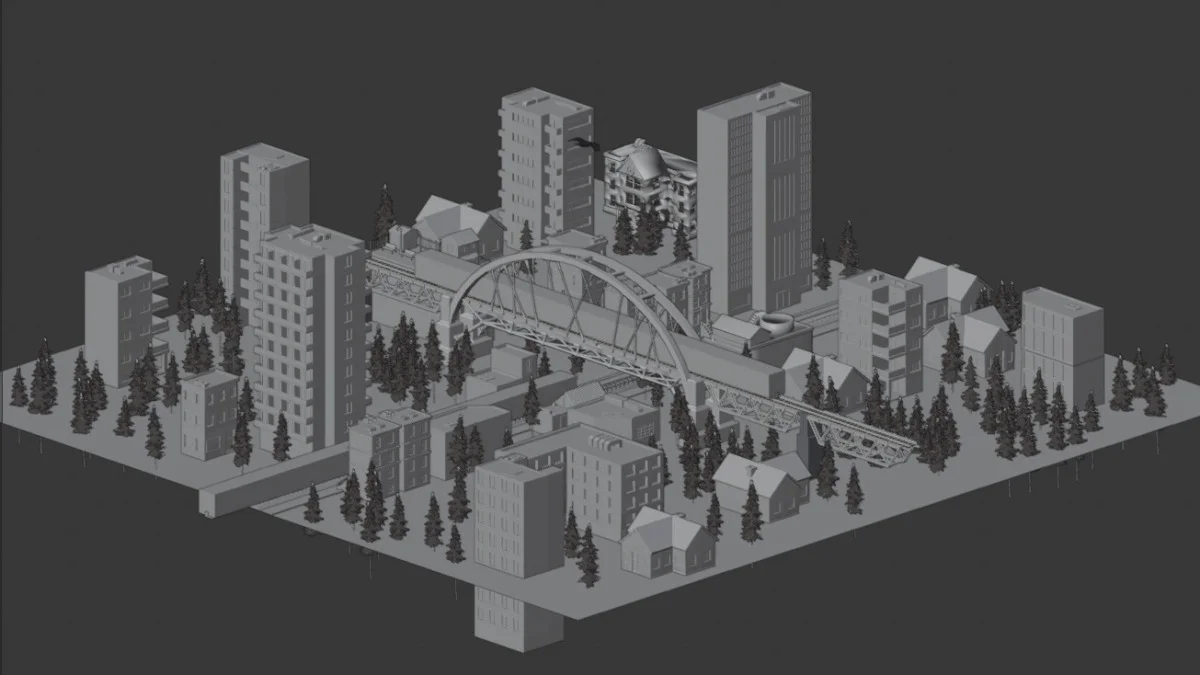
Here, a repeating chunk is effectively managed by a dynamic grid that maintains a 3x3 layout around the camera. These tiles are cloned and repositioned as the camera moves, creating an illusion of infinite depth while keeping memory usage minimal.
Simplified Lighting Using LightKit
In most of my projects, I rely on Three.js LightKit to handle lighting efficiently.
This add-on enables easy access to a wide array of HDRs from the Polyhaven library, allowing for cost-effective testing of various toneMapping and exposure settings.
Upon finalizing your settings, you can export them into a JSON file for future use, ensuring you don’t have to recalibrate lighting presets from scratch.
What’s more, it supports both WebGL and WebGPU projects and works seamlessly with vanilla JS and React.
Want to see it in action? You can check out the demo here: Three.js LightKit
The Conclusion
I hope this breakdown inspired you with techniques that can enhance your own projects! 🫡