Editor’s note: As we gear up for the inaugural Three.js Conference in Paris this September, we're excited to highlight the work of Francesco Michelini. In this detailed tutorial, he walks us through the steps of creating a dynamic, interactive 3D cluster, focusing on essential technologies such as Three.js, TSL, WebGPU, and three-start.
🎟️ Haven't grabbed your ticket yet? Through our collaboration with the first Three.js Conference, Codrops readers can enjoy a 15% discount using the code CODROPS. Get your ticket here →
If you’re anything like me, you often find yourself scrolling through social platforms, searching for ideas—be it for client work or personal projects.
This tutorial was inspired by a post I discovered on Instagram, which eventually blossomed into this interactive visual piece.
Disclaimer: This tutorial doesn't dive deep into every facet of Three.js or specific bundler configurations. I’ll leave the finer details for you to explore!
Understanding the Components of the Effect
Let's outline the key elements of our interactive experience:
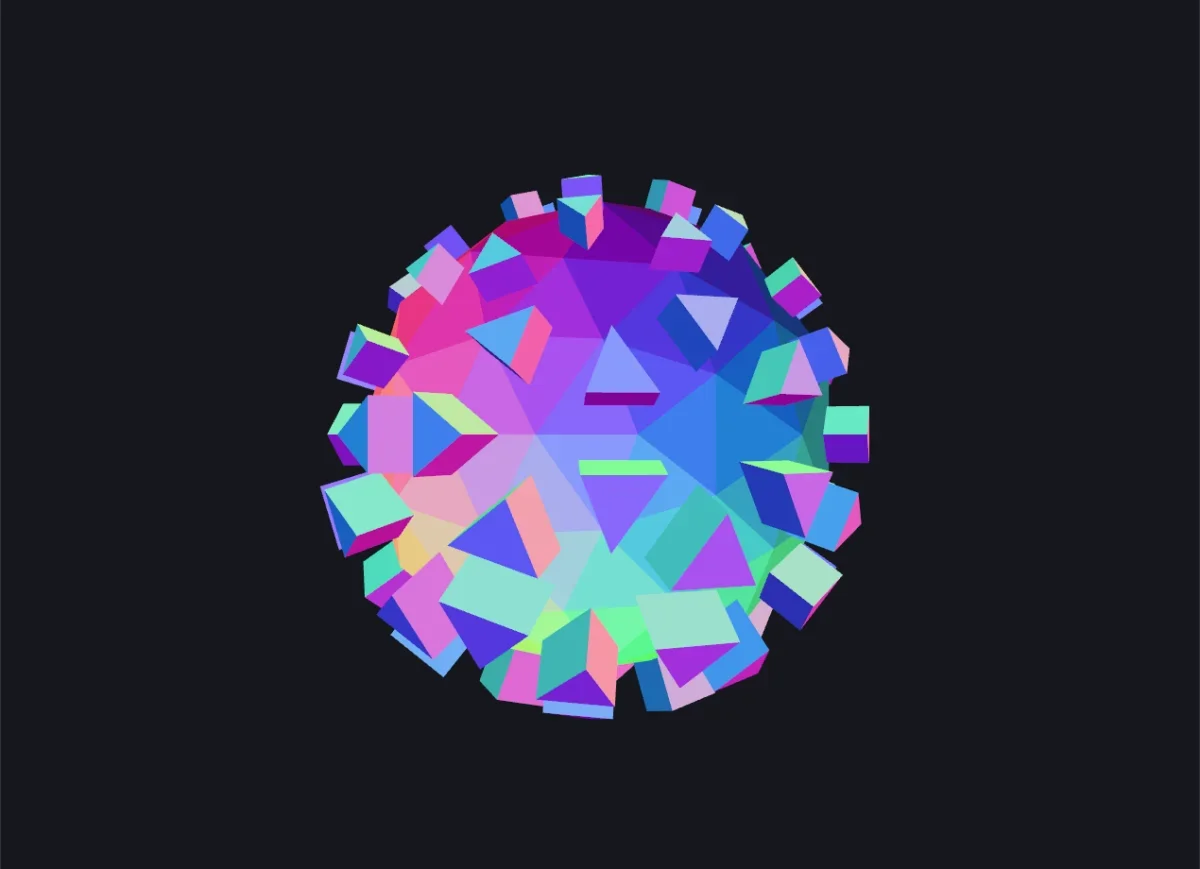
- A rotating icosahedron with extruded faces.
- Dynamic scaling of the faces using a built-in noise function.
- A dithering post-processing effect.
The highlight here? Two of these three essential components come pre-packaged with Three.js, making our job easier!
Tools We'll Use
- Three.js
- TSL
- three-start
- GSAP
Introducing Three Start
three-start is an emerging library design that simplifies starting a Three.js project with minimal code, effortlessly handling essentials like the render loop, renderer, camera, and resizing events.
What stands out about three-start is its modular approach, allowing you to break down a Three.js application into components and modules, enhancing maintainability.
Modules serve as global features that maintain a constant presence across your application, handling tasks like asset loading and physics. Components define behaviors applicable to individual Object3D elements.
For example, you could create a Spin component that specifies an axis and speed parameter. This allows you to rotate objects consistently across the scene—potentially even on multiple axes and speeds.
Let's jump right in and start building!
Setting Up the Project
To kick things off, install the necessary packages:
$ pnpm add three three-start gsapNext, establish the fundamental HTML structure:
<!doctype html>
<html lang="en">
  <head>
    <meta charset="UTF-8" />
    <link rel="icon" type="image/svg+xml" href="/favicon.svg" />
    <meta name="viewport" content="width=device-width, initial-scale=1.0" />
    <title>three-start</title>
  </head>
  <body>
    <div id="app"></div>
    <script type="module" src="/src/main.js"></script>
  </body>
</html>
In your /src/main.js file, set up a basic Three.js scene:
import './style.css';
import * as THREE from "three/webgpu";
import { ThreeStart, ThreeContextEvents } from "three-start";

const starter = new ThreeStart();
starter.mount(document.getElementById("app"));
starter.start();

const { scene, camera } = starter.ctx;
camera.position.z = 4;

// Log messages on each update to verify functionality.
starter.ctx.on(ThreeContextEvents.Update, () => {
  console.log('update')
})
You’ll open your browser and, well, see... nothing but a black screen. But check the console—if it’s logging a lot of update messages, then you’re on the right track!
Initiating Our Icosahedron
First, create the material in materials/Inner.js for better organization:
import { MeshNormalNodeMaterial, BackSide } from 'three/webgpu'

export const InnerMaterial = new MeshNormalNodeMaterial({
  side: BackSide,
  flatShading: true,
})
Important: We're rendering the back faces intentionally with side: BackSide for a specific effect, and we’ll revisit this as we progress.
Next, incorporate the mesh into main.js:
...

import { InnerMaterial } from "./materials/Inner";

...

const innerGeometry = new THREE.IcosahedronGeometry(1, 1);
const innerMesh = new THREE.Mesh(innerGeometry, InnerMaterial);
scene.add(innerMesh);
And there we have it, our igloo-shaped icosahedron!

Before diving deeper, let’s introduce a Spin behavior through three-start. Create this in behaviors/Spin.js:
import { Object3DBehaviour } from "three-start";

export class Spin extends Object3DBehaviour {
  #initRotY = 0
  speed = 1

  constructor(speed = 1) {
    super()
    this.speed = speed
  }

  onUpdate() {
    const dt = this.ctx.getDeltaTime();
    this.object.rotation.y += dt * this.speed; // This ensures continuous rotation.
  }

  onDestroy() {
    this.object.rotation.y = this.#initRotY;
  }
}
Creating a behavior isn’t difficult—just extend the Object3DBehaviour class and manage everything through lifecycle hooks.
Add the Spin behavior to the Icosahedron in main.js:
// Import the addComponent module from three-start
import { ThreeStart, ThreeContextEvents, addComponent } from "three-start";

...

// Now add it to the mesh, with `-0.4` as the speed parameter for the Spin class.
addComponent(innerMesh, Spin, -0.4);
If you followed correctly, the mesh should be spinning now.
Keep in mind: If the visuals seem “off,” it's normal since we're rendering the inner faces of the mesh.
Creating and Extruding the Faces
Here's where the excitement kicks in! We need to create the facets of the icosahedron, utilizing a BatchedMesh for this.
Let's start with the material for these faces:
// materials/Cluster.js
import { MeshNormalNodeMaterial } from 'three/webgpu'

export const ClusterMaterial = new MeshNormalNodeMaterial()
Now, it’s time to handle the mesh itself:
// main.js

import { ClusterMaterial } from './materials/Cluster'

...

function createExtrudedFaces(mesh) {
  if (!mesh) return console.error('Mesh is required');

  const { geometry } = mesh;
  const { position: meshPosition } = mesh;
  const positionAttribute = geometry.getAttribute('position');
  const { length: numVertices } = positionAttribute.array;
  const faceCentroid = new THREE.Vector3();
  const faceDirection = new THREE.Vector3();
  const instanceMatrix = new THREE.Matrix4();

  const numFaces = numVertices / 9; // Each face has 3 vertices.

  // Initialize the batched mesh.
  const facesMesh = new THREE.BatchedMesh(
    numFaces,
    numVertices * 6,
    numVertices * 6,
    ClusterMaterial,
  );

  // Loop through the vertices, creating geometry for each face.
  for (let i = 0; i < numVertices; i += 9) {
    const [x1, y1, z1, x2, y2, z2, x3, y3, z3] = positionAttribute.array.slice(i, i + 9);

    // Calculate centroid.
    faceCentroid.set((x1 + x2 + x3) / 3, (y1 + y2 + y3) / 3, (z1 + z2 + z3) / 3);
    faceDirection.copy(faceCentroid).sub(meshPosition).normalize();

    const instanceGeometry = new THREE.BufferGeometry();
    const attributeArray = new Float32Array([x1, y1, z1, x2, y2, z2, x3, y3, z3]);
    const posAttribute = new THREE.Float32BufferAttribute(attributeArray, 3);
    instanceGeometry.setAttribute('position', posAttribute);
    instanceGeometry.translate(-faceCentroid.x, -faceCentroid.y, -faceCentroid.z);

    // Compute normals for the instance geometry.
    instanceGeometry.computeVertexNormals();
    const instanceGeometryID = facesMesh.addGeometry(instanceGeometry);
    const instanceID = facesMesh.addInstance(instanceGeometryID);
    instanceMatrix.makeTranslation(faceCentroid.x, faceCentroid.y, faceCentroid.z);
    facesMesh.setMatrixAt(instanceID, instanceMatrix);
   }

  innerMesh.add(facesMesh);
}

createExtrudedFaces(innerMesh);
Key highlights include:
- Creating a new
BatchedMesh. - Iterating through vertices to construct geometries, nine at a time.
- Computing normals and adding to the main mesh.
Here's how it looks now:

Extruding Each Face
Unfortunately, Three.js lacks a straightforward way to extrude faces, so we have to take a manual approach here.
In the previous step, we generated a new BufferGeometry for each face. This time, we’ll further build on this by extending those geometries, translating them outward along the faceDirection.
Recalling the vertices defined earlier:
x1, y1, z1x2, y2, z2x3, y3, z3
We’ll generate additional vertices and extrude them a bit:
x4, y4, z4x5, y5, z5x6, y6, z6
Check out the visual representation for clarity:

...

// In the `createExtrudedFaces()` function, define the extrusion distance
const faceExtrusion = 0.45;

const x4 = x1 + faceDirection.x * faceExtrusion;
const y4 = y1 + faceDirection.y * faceExtrusion;
const z4 = z1 + faceDirection.z * faceExtrusion;

const x5 = x2 + faceDirection.x * faceExtrusion;
const y5 = y2 + faceDirection.y * faceExtrusion;
const z5 = z2 + faceDirection.z * faceExtrusion;

const x6 = x3 + faceDirection.x * faceExtrusion;
const y6 = y3 + faceDirection.y * faceExtrusion;
const z6 = z3 + faceDirection.z * faceExtrusion;

...

// Update `attributeArray` to include the new vertices
const attributeArray = new Float32Array([
  x1, y1, z1,
  x2, y2, z2,
  x4, y4, z4,

  x2, y2, z2,
  x5, y5, y5,
  x4, y4, z4,

  x2, y2, z2,
  x3, y3, z3,
  x5, y5, z5,

  x3, y3, z3,
  x6, y6, z6,
  x5, y5, z5,

  x3, y3, z3,
  x1, y1, z1,
  x6, y6, z6,

  x1, y1, z1,
  x4, y4, z4,
  x6, y6, z6,

  x4, y4, z4,
  x5, y5, z5,
  x6, y6, z6,
]);
Here’s the outcome:

With those six vertices, we laid the groundwork for all triangles that make up each instance of our BatchedMesh.
Almost there! Now let’s tackle the visual elements.
Animating with Noise
For the next phase, update materials/Cluster.js as follows:
import { MeshNormalNodeMaterial } from 'three/webgpu'
import { attribute, positionLocal, Fn, float, mx_noise_float, time } from 'three/tsl'

export const ClusterMaterial = new MeshNormalNodeMaterial()

const scaleMin = float(0.15)
const scaleMax = float(0.75)
const centered = attribute('position', 'vec3')
const centroid = positionLocal.sub(centered);

ClusterMaterial.positionNode = Fn(() => {
  const t = time.mul(0.5);
  const noise = mx_noise_float(centroid.yz.add(t));
  noise.remapAssign(-1, 1, scaleMin, scaleMax);
  return centroid.add(centered.mul(noise));
})()
This segment generates a noise value influenced by the centroid of each instance combined with the time variable. This noise, originally ranging from -1 to 1, is remapped to create an organic movement scale between 0.15 and 0.75.
Final Touches on Colors
Let's hide the inner mesh by adjusting the InnerMaterial to complete our cluster project.