Transforming 2D Images into 3D Illusions with Depth Mapping and Three.js
In the realm of digital art and 3D rendering, the ability to make flat images come alive has transformed creative possibilities. Utilizing depth maps in conjunction with Three.js allows developers and artists to manipulate 2D imagery, enabling realistic lighting, surface detail, and self-shadowing effects. This guide will explore the techniques of employing depth estimation models and various coding strategies to achieve this intriguing visual effect.

Using a depth map is crucial in transforming a static image into a sensibly interactive visual. Depth estimation models excel at translating a flat 2D image into a depth map—a grayscale representation where white indicates proximity and black signifies distance.
Generating a Depth Map
The generation of a depth map can be initiated using models like Depth Anything or through custom tools, such as the Depth Generation Tool specially developed for this purpose. The output is a raw depth map, which often poses certain challenges due to its inherent limitations as an 8-bit image, only capable of capturing 256 depth values. This limited resolution can lead to quantization errors, which can critically affect lighting outcomes.
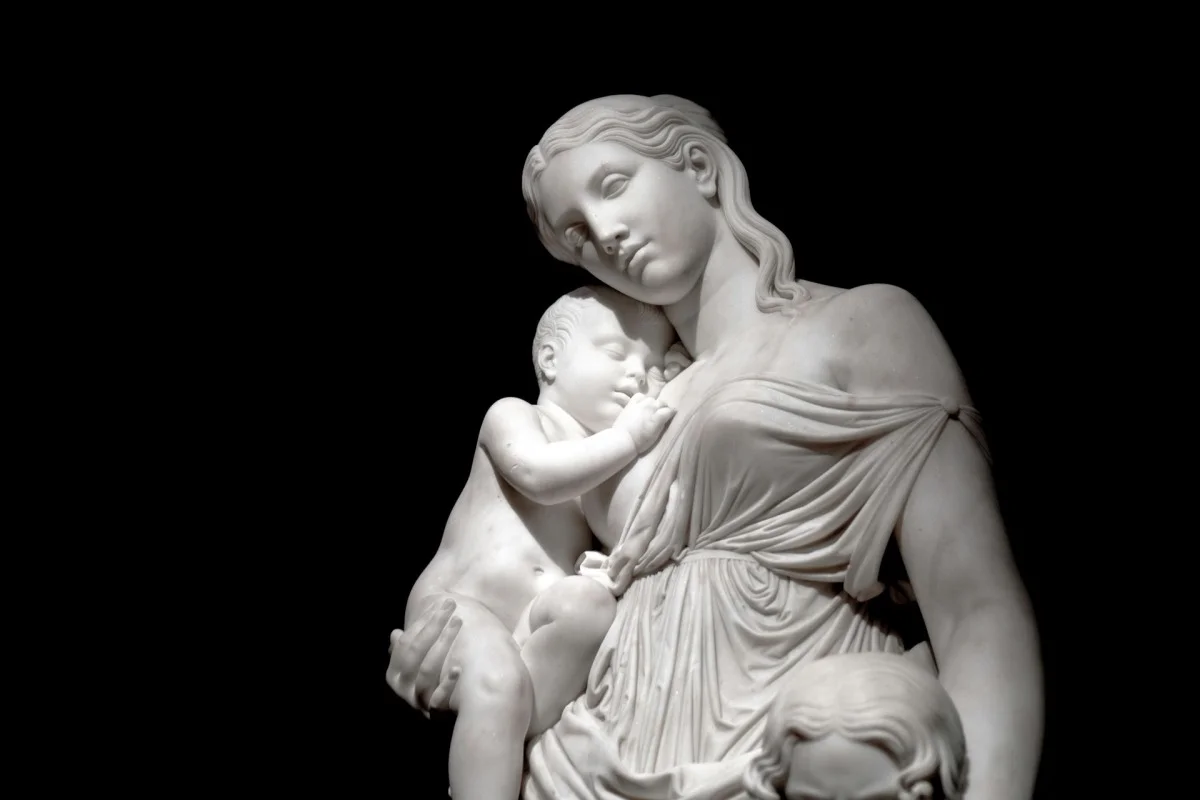
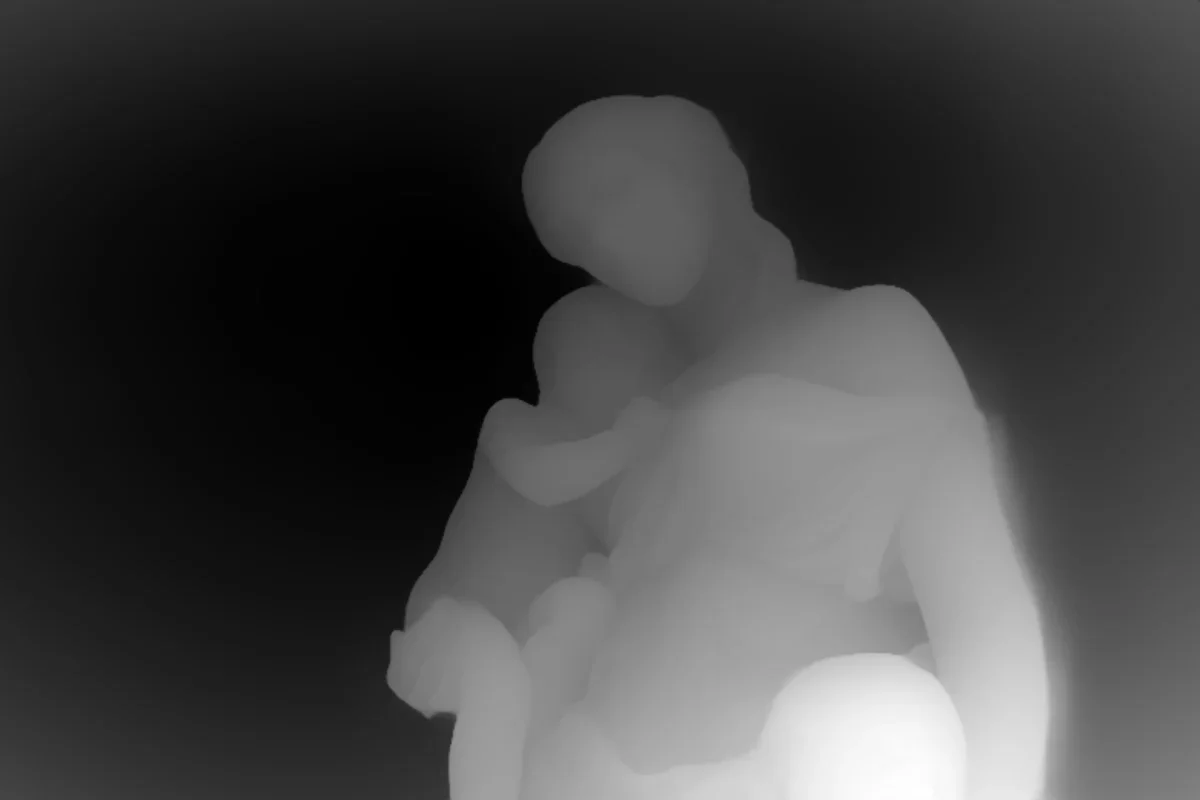
To refine the depth map, it’s necessary to convert it to floating-point values and apply a blur to smoothen the abrupt transitions present in the original data. This processing is vital for accurate lighting interpretation.
const { data } = context.getImageData(0, 0, width, height)
const values = new Float32Array(width * height)
for (let i = 0; i < values.length; i++) {
  values[i] = data[i * 4] / 255
}

// blur to eliminate the harsh transitions
smoothBands({ values, width, height }, radius)

const halfFloats = new Uint16Array(values.length)
for (let i = 0; i < halfFloats.length; i++) {
  halfFloats[i] = DataUtils.toHalfFloat(values[i])
}
Creating Normal Maps
Next comes the essential step of crafting a normal map, which is pivotal for simulating how light interacts with a surface. Instead of creating 3D geometry, we assign normals to each pixel in accordance with our generated depth map. This method makes the 2D surface react to lighting as if it had real dimensionality.
const depthGradient = Fn(([vUv, step]) => {
  const left = smoothDepthNode.sample(vUv.sub(alongX)).r
  const right = smoothDepthNode.sample(vUv.add(alongX)).r
  const bottom = smoothDepthNode.sample(vUv.sub(alongY)).r
  const top = smoothDepthNode.sample(vUv.add(alongY)).r

  return vec2(right.sub(left), top.sub(bottom)).mul(0.5)
})
By sampling the depth map to generate gradients, we can visualize the normal map effectively. The style of these gradients plays a crucial role in adding depth perception to the image.
Shadow Effects
Besides managing the reflections of light, another dimension of depth maps is shadow casting. Each pixel's relative position to the light source is evaluated, and if it detects a depth change—indicative of a surface protrusion—a shadow is rendered in response. This technique uses multiple depth samples along a line extending toward the light to compute soft shadows.
const occlusion = float(0).toVar()

for (let i = 0; i < SHADOW_STEPS; i++) {
  // logic to sample the depth and calculate occlusion
}
Finalizing the Material
Finally, all processed elements—texture, normals, and shadows—are fed into the MeshPhongNodeMaterial. This material is adept at executing the lighting calculations necessary for the depth-enhanced image, culminating in a visually compelling result.
const material = new MeshPhongNodeMaterial({ specular: 0x000000 })
material.colorNode = diffuseNode(vUv, depth)   // our image
material.normalNode = normalNode(vUv)          // normals from depth-map
material.aoNode = shadowNode(vUv, depth)       // shadows
Conclusion
Engaging with depth mapping and Three.js unlocks vast potential for creative expression. As this technology evolves, the chance to craft immersive visual stories from ordinary images grows more promising. Explore the tutorials and demos linked here to broaden your understanding and spark new ideas in your work.

Looking forward to seeing your creative adaptations of these techniques in the burgeoning area of depth mapping!