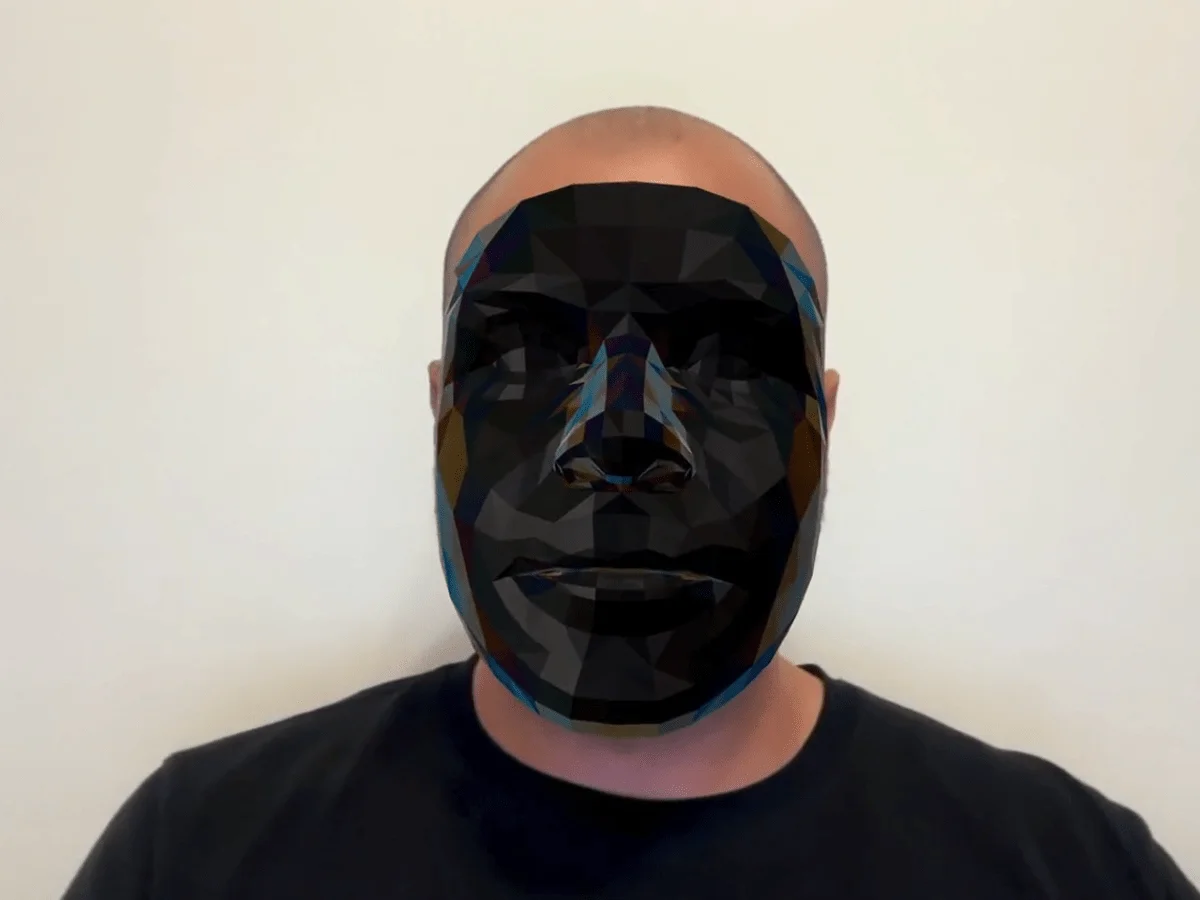
Editor’s Note: As we celebrate the first Three.js Conference, we’re incredibly excited to highlight Marek Jóźwiak. His fantastic tutorial and demo showcase his skill and meticulousness in exploring MediaPipe, Threlte, and Three.js. We're thrilled to feature his work!
🎟️ Paris is calling! The inaugural Three.js Conference is set to take place in Paris, featuring two days of discussions, ideas, and networking opportunities. Use code CODROPS for 15% off and get your ticket →
Initially, I aimed for a simple task: applying a Three.js material to my own face.
The first attempt didn't go as planned. MediaPipe managed to track my face, but Three.js lacked an appropriate surface for rendering. Even after defining a mesh topology, I faced discrepancies in framing and issues with upside-down textures.
This exercise ultimately focused on utilizing Google's predefined face topology, effectively transferring the UV mapping from their standard model, and ensuring it aligned accurately with the camera's perspective. Getting MediaPipe and Three.js to work together was the straightforward part.
Transforming Landmarks into a Textured Mesh
The runtime operates on two distinct clocks: MediaPipe processes the video input, updating a mutable reference in real-time. Threlte reads this reference during its rendering cycle, adjusting the existing BufferGeometry based on the latest data. However, the inference can miss render frames, thereby skipping the need to transfer 468 variable positions through Svelte’s reactivity.
At the core, the camera layer follows traditional methods. Still, the real crux lies in the visual details: the video element uses object-cover and is mirrored, necessitating that the mesh accurately reflects those transformations.
To simplify the MediaPipe integration, I encapsulated it within a dedicated service class which handles task initialization and configuration for the face model, leveraging the GPU for computations.
const VISION_BASE_URL = 'https://cdn.jsdelivr.net/npm/@mediapipe/tasks-vision@0.10.35/wasm';

const filesetResolver = await FilesetResolver.forVisionTasks(VISION_BASE_URL);

this.faceLandmarker = await FaceLandmarker.createFromOptions(filesetResolver, {
	baseOptions: {
		modelAssetPath: 'https://storage.googleapis.com/mediapipe-models/' + 'face_landmarker/face_landmarker/float16/1/' + 'face_landmarker.task',
		delegate: 'GPU'
	},
	outputFaceBlendshapes: true,
	runningMode: 'VIDEO',
	numFaces: 1
});
In video mode, timestamps must increase monotonically, and performance.now() serves as a reliable source:
startPrediction(videoElement: HTMLVideoElement) {
  const predict = () => {
    if (this.faceLandmarker && videoElement.readyState >= 2) {
      const results = this.faceLandmarker.detectForVideo(videoElement, performance.now());
      this.landmarksRef.current = results;
    }

    this.requestRef = requestAnimationFrame(predict);
  };

  predict();
}
Storing the results in landmarksRef as a simple object instead of a reactive Svelte array proved beneficial. Reworking all 468 positions shouldn’t trigger unnecessary UI updates in Svelte's reactive framework; Three.js reads these values during its own execution loop, keeping the system efficient.
The model returns a total of 478 landmarks, 468 of which align with MediaPipe’s canonical face model. The remaining additional points correspond to iris locations, which are irrelevant for the mask's surface.
With stable landmark positions established, my next challenge was defining which landmarks formed the mesh surface, necessitating an index buffer:
[
	127,
	34,
	139, // triangle 1
	11,
	0,
	37, // triangle 2
	232,
	231,
	120 // triangle 3
];
The sequence here is critical, as it dictates the mesh's 'winding' order, thus influencing which side is deeming the front face in Three.js.
Google has provided the essential face mesh topology, which I located in the TensorFlow.js models repository. This file begins with the same landmark sequence:
127, 34, 139,
11, 0, 37,
232, 231, 120,
This file includes 2,640 indices across 880 triangles. I incorporated the data directly into FaceTriangulation.ts to use as FACE_MESH_TRIANGULATION.
Furthermore, the MediaPipe repository contains a FACE_LANDMARKS_TESSELATION within its Python API, storing connections instead of triangles. Its opening entries are:
Connection(127, 34),
Connection(34, 139),
Connection(139, 127),
Connection(11, 0),
Connection(0, 37),
Connection(37, 11),
The connection table effectively encodes the same information as closed-edge cycles. Each connection sets forms triangles, crucial for rendering.
The TensorFlow.js indexing structure is particularly useful for the BufferGeometry as it directly provides triangle triples, whereas the MediaPipe connections are helpful for effects needing defined regions like the mouth or eyes.
Both repositories release their code under the Apache 2.0 license, facilitating transparency and reusability.
Once the indices were secured, I was able to allocate geometry buffers immediately:
const vertexCount = 468;
const indices = new Uint16Array(FACE_MESH_TRIANGULATION);
const positions = new Float32Array(vertexCount * 3);
const uvs = FACE_MESH_UVS;
Following this, Threlte set up the Three.js buffer attributes:
<T.BufferGeometry bind:ref={geometry}>
	<T.BufferAttribute
		args={[positions, 3]}
		attach="attributes.position"
		count={vertexCount}
		itemSize={3}
		usage={THREE.DynamicDrawUsage}
	/>

	<T.BufferAttribute args={[uvs, 2]} attach="attributes.uv" count={vertexCount} itemSize={2} />

	<T.BufferAttribute args={[indices, 1]} attach="index" count={indices.length} itemSize={1} />
</T.BufferGeometry>
It's worth highlighting that DynamicDrawUsage is merely a hint for the driver, unrelated to the update process itself. Instead, the subsequent position.needsUpdate = true flag prompts the system for a buffer update. In this scenario, the topology and UVs remain constant, while the 468 XYZ positions will be dynamically rewritten based on the data stream.
Starting with wireframe rendering makes it easier to spot issues. A black material can obscure poor topology, but a wireframe layout brings any discrepancies like incorrect vertices or scaling anomalies to light.
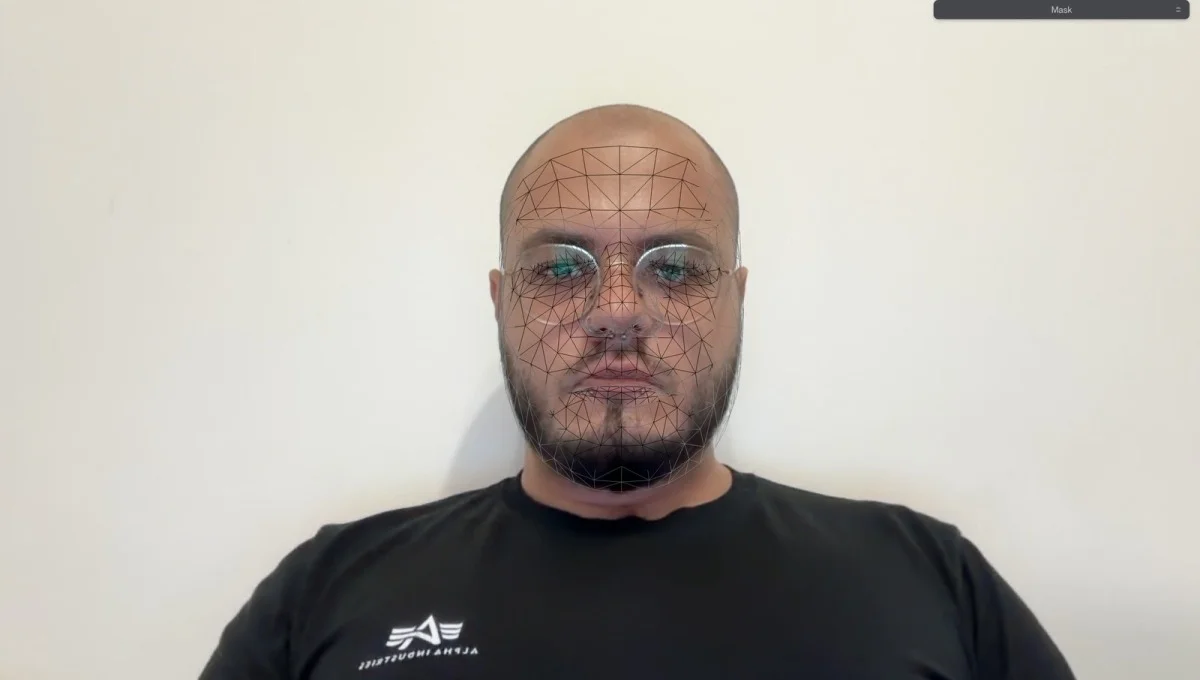
The triangle indexing resolved connectivity issues; however, texturing was another matter, as the UV attributes must be reordered to fit the 468 vertex structure.
Google offers a canonical_face_model.obj in the MediaPipe repository. This model serves as a bridge between static and runtime data. The critical invariance is the shared landmark indexing: each vertex in the canonical model corresponds directly to the landmarks returned from detection.
Moreover, this directory includes Google’s canonical_face_model_uv_visualization.png, which is a useful debugging texture, showcasing a grid that highlights any flipped or mismatched UV mappings.
The OBJ file contains:
- 468
vrecords for vertex coordinates; - 468
vtrecords for texture coordinates; - 898
frecords detailing faces.
This piece of information underscores a vital distinction: while the TensorFlow.js index comprises 880 triangles, the canonical OBJ contains 898 faces, which are not identical. Therefore, I made the choice not to merge them; the runtime index stems entirely from triangulation.js, whereas the OBJ only aided in UV mapping recovery.
By addressing the index through BufferGeometry, it allows all vertex attributes to be addressed simultaneously. Once the UV array is reordered corresponding to the landmark positions, each triangle can smoothly interpolate to render the correct attributes.
The next hurdle was reestablishing the vertex-to-UV mapping. Although the number of v and vt records matched, their order in the file didn’t directly correspond to the mapping. The OBJ face records clarify this relationship:
f 174/43 156/119 134/220In this example, 174/43 signifies that vertex 174 corresponds to texture coordinate 43. As the OBJ indices are one-based, adjustments are necessary to map them effectively into JavaScript arrays.
I created a small Node.js script to extract this relationship into a typed TypeScript array. Parsing an OBJ in real-time would have unnecessarily complicated the demo since the UVs remain constant.
const objPath = join(__dirname, '../src/lib/assets/models/canonical_face_model.obj');
const outputPath = join(__dirname, '../src/lib/utils/FaceUVs.ts');
The parser gathers all vt entries before connecting them back to their respective vertices via each f token:
const textureCoords = [];
const vertexToUV = new Map();

for (const line of lines) {
	const trimmed = line.trim();

	if (trimmed.startsWith('vt ')) {
		const parts = trimmed.split(/\s+/);
		const u = parseFloat(parts[1]);
		const v = parseFloat(parts[2]);

		textureCoords.push([u, v]);
	} else if (trimmed.startsWith('f ')) {
		const parts = trimmed.split(/\s+/).slice(1);

		for (const part of parts) {
			const indices = part.split('/');
			const vertexIdx = parseInt(indices[0]) - 1; // Adjust from one-based to zero-based index
			const uvIdx = parseInt(indices[1]) - 1;

			if (!vertexToUV.has(vertexIdx)) {
				vertexToUV.set(vertexIdx, uvIdx); // Map the vertex to its corresponding UV
			}
		}
	}
}
In this canonical OBJ file, all 468 vertices correspond to one unique UV, establishing a one-to-one relationship. Adopting the first recorded assignment here is dependable. However, employing a one-size-fits-all strategy for OBJ files isn't practical; some models include UV seams that may assign multiple texture coordinates to the same vertex, necessitating that vertex duplication in the render buffer.
With the mapping established, the script generates the UV coordinates in landmark order:
const uvArray = [];

for (let i = 0; i < 468; i++) {
	const uvIdx = vertexToUV.get(i);

	if (uvIdx !== undefined && textureCoords[uvIdx]) {
		const [u, v] = textureCoords[uvIdx];
		uvArray.push(u, 1.0 - v); // Flip Y coordinate
	} else {
		uvArray.push(0.5, 0.5); // Default texture coordinate
	}
}
This results in a Float32Array with 936 values—two for each vertex. The vertical flip is performed here; thus, when loading the texture in Three.js, I needed to disable the default texture flip:
texture.flipY = false;
texture.colorSpace = THREE.SRGBColorSpace;
Getting this mapping wrong resulted in the mask rendering upside down. It’s critical to flip either the UV data or the texture, but not both at the same time.
Synchronizing the Mesh with the Camera
With the topology and UV mapping resolved, the next issue was ensuring spatial accuracy. MediaPipe outputs normalized coordinates, while the mesh operates in Three.js's world units.
For a perspective camera setup, the following calculation determines the visible height at a given distance d:
const distance = camera.position.z;
const vFov = (camera.fov * Math.PI) / 180;
const height = 2 * Math.tan(vFov / 2) * distance;
const width = height * viewportAspect;
If the video were stretched proportionally to the viewport, width and height alone would suffice. However, because of the object-cover rule, additional considerations are necessary:
let scaleX = width;
let scaleY = height;

const videoAspect = videoElement.videoWidth / videoElement.videoHeight;
const screenAspect = viewportWidth / viewportHeight;

if (screenAspect > videoAspect) {
	scaleY = width / videoAspect; // Adjust scaleY if the screen is wider
} else {
	scaleX = height * videoAspect; // Adjust scaleX if the video is taller
}
In scenarios where the screen's width surpasses the video image, object-cover scales the video by width, resulting in vertical cropping. Conversely, narrower screens cause the opposite effect, requiring the WebGL plane to adjust accordingly.
Next, each landmark can be accurately mapped onto the visible plane, also maintaining the depth perception offered by MediaPipe:
const z = -landmark.z * scaleX * maskScale * depthScale + offsetZ;
const depthRatio = (distance - z) / distance;

const x = ((0.5 - landmark.x) * scaleX * maskScale + offsetX) * depthRatio;
const y = (-(landmark.y - 0.5) * scaleY * maskScale + offsetY) * depthRatio;
The adjustment of 0.5 helps position the normalized coordinates correctly. Additionally, signs on the X and Y values consider the mirrored video, along with the opposing axes of image and WebGL space. The Z value is calibrated based on width, with a distinct multiplier because MediaPipe's depth measurements are relative rather than absolute.
As MediaPipe's X and Y values are already in screen coordinates, assigning non-zero Z positions allows a correct projection through a perspective camera—ensuring the mesh aligns with the tracked facial position. Here, the camera is anchored at (0, 0, 5), with the reference plane defined at z = 0, ensuring vertices move along the intended ray.
To aid development, I used Tweakpane for scale and offset adjustments, particularly when testing various webcams. Most of the alignment is done through aspect calculations.
With the projection established, it becomes easy to input current landmark positions into the allocated buffer via Threlte’s useTask callback, effectively hiding the mask when no face is detected: